
- About
- Courses
-
Destinations
EuropeNew Zealand
- Journal
- Contact

 Free Brochure
Book
+44(0) 1225 632 165
Free Brochure
Book
+44(0) 1225 632 165
Use this lockdown to prepare your skis for their very own lockdown. Don't neglect them, store them properly, and you'll be rocking and rolling next winter.
It comes around every year, no matter how much we hold it off. The time to pack away your skis for another winter. But when that time comes, don't just toss your gear in the garage and deal with the rusty fallout when the snow returns. Instead take some time to prepare your skis for storage. This will help keep the rust away, prolong the life of your setup, and improve how your skis perform. With isolation giving us more time than ever, now is the perfect opportunity to learn to care for the planks that will bring you so much freedom when we're back in the mountains. Follow these simple steps.
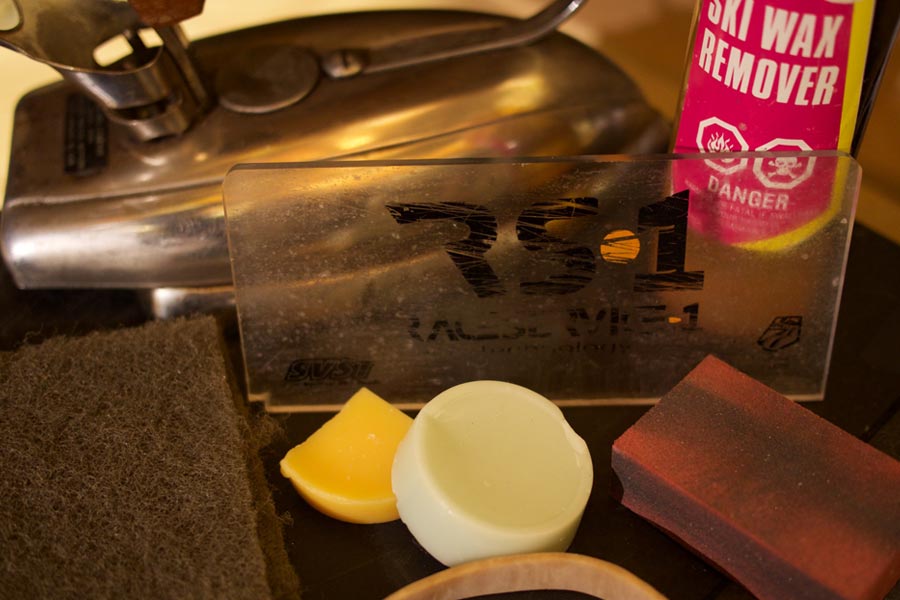
What you need
Step 1 - clean your skis
After riding through spring, your skis may have picked up some unwanted grime. Using a damp cloth, give your skis a thorough clean to remove any obvious dirt or debris. If they are particularly dirty, you could even give them a hose down.
Wipe the top sheets, bases, edges and around the bindings. Remember to dry your skis properly before moving on. If you’re not in a rush, let them dry out overnight.
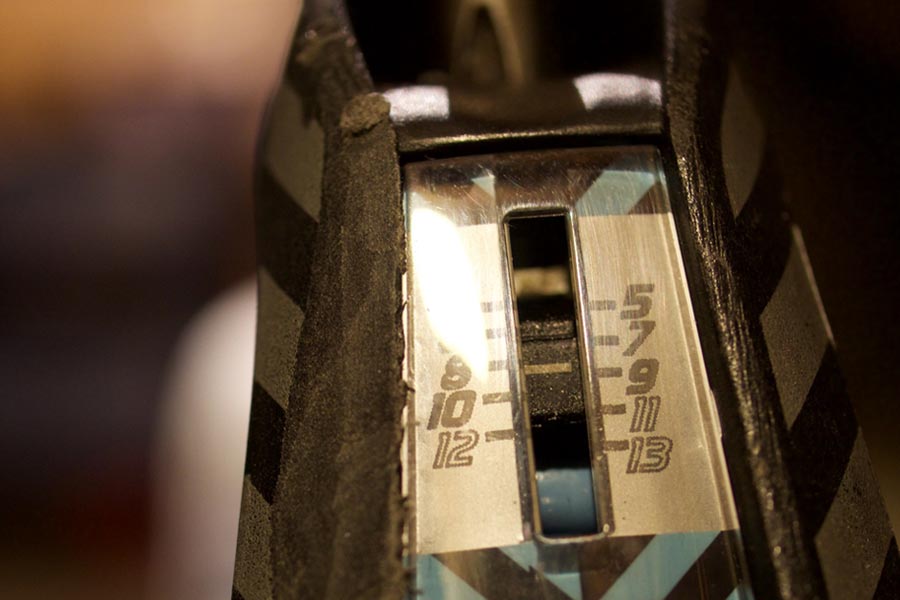
Step 2 - reduce binding tension
The toe and heel pieces of your bindings are made of up internal springs that control the retention and release of your ski boot. When the DINs are turned up, it puts the springs under compression. To ensure your springs retain their shape, it can be a good idea to reduce the tension by lowering the DIN. To do this, locate the screws in the tow and heel pieces. Then use a screwdriver to turn the screws counter-clockwise until you reach a low number on the DIN scale.
Reducing the tension in your bindings is totally up to you. Some people like doing it, others don't think it makes any difference.
If you do opt lower the tension, remember to reset your DINs to their original settings before you get back on snow. As a reminder to yourself, stick some tape on the DIN indictors with your original numbers written on. We recommend you have a qualified technician set the DIN so it’s right for you.
Step 3 – inspect your edges
Before jumping ahead, use a rubber band to get your brakes out of the way. Pull the brakes up, hook the band on one break, over the binding and then attach it to the break on the other side.
Give your setup a quick once over to check for any damage or rusting to the edges. Run a gummy stone over each edge in short, overlapping strokes, paying attention to any burrs, nicks or rust.
You could choose to do a full tune and sharpen your edges, but you may want to save this for the start of next season.

Step 4 – prepare your bases
If you've got some base cleaner, apply it to your bases to remove any base-clogging compounds. These can damage the base material and reduce its ability to hold wax in the future.
Take your plastic scraper and run it from tip to tail down the base of your ski, removing any residue wax as well as smoothing out any ‘hairs’ that may have built up over the winter. 2-3 passes should be enough.
Then, grab your nylon brush and push from tip to tail to get rid of any leftover debris.
Step 5 – wax your skis
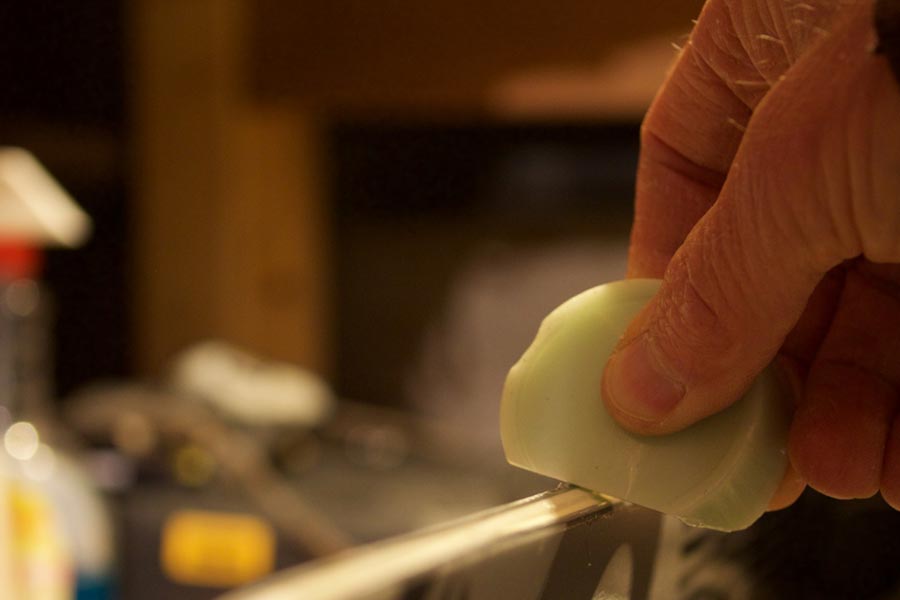
With your bases clean, it’s time for the wax. First, rub some wax onto the bases from tip to tail. This technique can prevent burning the bases during the ironing.
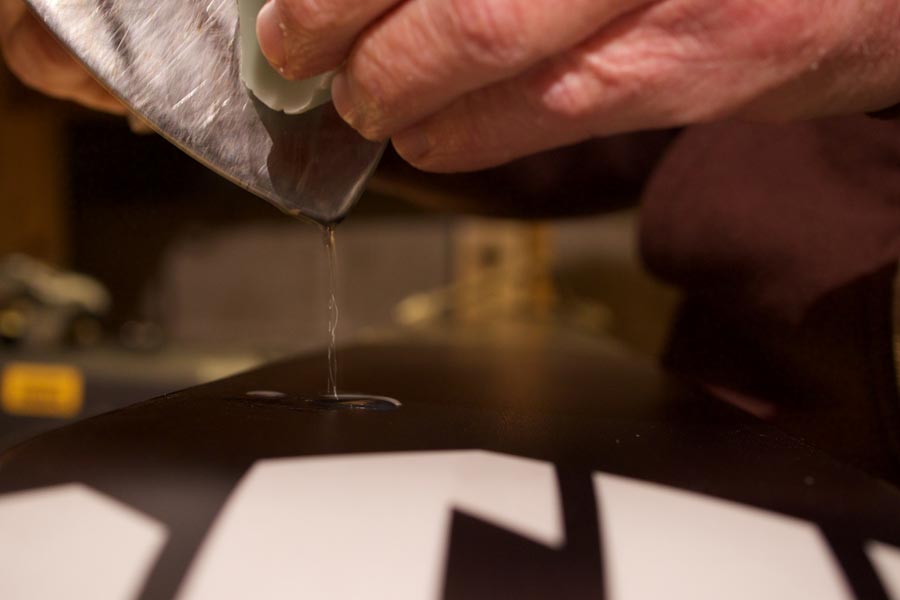
Next, with your waxing iron and all-purpose wax, drip several lines of wax down the full length of the ski. You want to apply a thick layer as your bases will absorb a lot of wax over the summer, so be liberal with the application. 2-3 times more than you’d usually use is a good rule of thumb.
Once the iron is hot enough, melt the wax into the base by moving the iron along the ski from tip to tail, in a slight back and forth motion. The aim should be to leave a wet puddle of wax behind the iron a few inches long.
Ensure you cover the entire base of the ski and let the wax run over the edges. 2-4 passes should be sufficient to penetrate the wax well into the base.
Let the wax cool and do not scrape it off the base. This is what will protect your skis from air, moisture and dirt.
Step 6 – protect the edges
After your skis have cooled to the touch, you can further protect the edges from rust by rubbing wax along them or applying a thin layer of oil.
Step 7 – store your setup
Where you store your skis is one of the most important elements in keeping your setup in good condition. Store your gear somewhere cool, dry and out of direct sunlight.
Avoid overly hot or damp environments, as this can cause damage to the top sheets and bases or rusting. Garages, basements and attics tend to be a little risky.
Loosely strap your skis from base to base and place them in a natural position, with no pressure on the camber, rocker or brakes. Putting your skis back in their a ski bag can be a good idea. This shelters them from sunlight and dust, and protects them from picking up any unwanted nicks.
Step 8 – don’t forget your boots
Before putting your boots away, pull the liners out and ensure everything is dry, including the sole bed.
Once dry, place the liners back into their shells and buckle the boots up loosely. This will help to hold the shape of your boots for years to come.
You don't want to be caught off guard next season, so check the toe and heel plates of your boots for any wear and tear, and replace them if you feel necessary. Store your boots in a dry place.
Step 9 – wait for snow
When snow begins fall again, your skis will be ready to rip. Remember to scrape off all the storage wax before you hit the slopes and readjust your DINs if you dialled them down.
Depending on how fast you want your skis to glide, you may want to apply a new layer of wax for the correct temperature. If you didn't tune your skis, give your edges a sharpen to provide maximum grip on snow.
Can't wait?
If you're itching to get back on the slopes, look out for early season skiing at the high-altitude resorts. We kick off our season in Cervinia, Italy with an all-mountain camp.


We look forward to speaking with you.


